MERCURIAL
THE PROCESS
THE PROCESS

Intense Emotions
How can I represent drastic internal emotions
(DESPAIR, RAGE, PEACE) visually.
Concept
Animatic
To visually represent despair, rage, and peace in my thesis, I need to carefully consider the movement and flow of the narrative, starting with a depiction of despair, followed by an exploration of rage, and ending with a depiction of peace.
FINAL FRAMES
Houdini became my bread and butter for the special simulations I had in the thesis. Here are some of quick breakdowns of the simulations I created.
SIMULATIONS
Ocean - Fluid Tank
First, I searched online and found a free model of a boat that I liked. I downloaded it in Alembic format and imported it into Houdini.
Next, I created a fluid tank using a container object and set the appropriate parameters for the fluid simulation, such as the resolution and viscosity. I wanted the fluid to have a natural, flowing motion, so I took care to set these parameters correctly.
Then, I created a collision object to represent the boat within the fluid simulation. I used the boat model I found online as a basis for this collision object and adjusted its size and position to fit within the fluid tank.
With the collision object in place, I set up the fluid simulation to interact with the boat. This involved setting the collision object as a collision geometry for the fluid so that the fluid would respond to the boat's presence and move around it.
To make the simulation more realistic, I added additional effects and post-processing, such as white water foam. I spent some time tweaking the settings to get the desired result.
Finally, I ran the simulation and watched as the boat floated gracefully in the fluid tank. I was really happy with how it turned out and felt like I had created a believable and visually compelling scene in Houdini using a free boat model I found online.

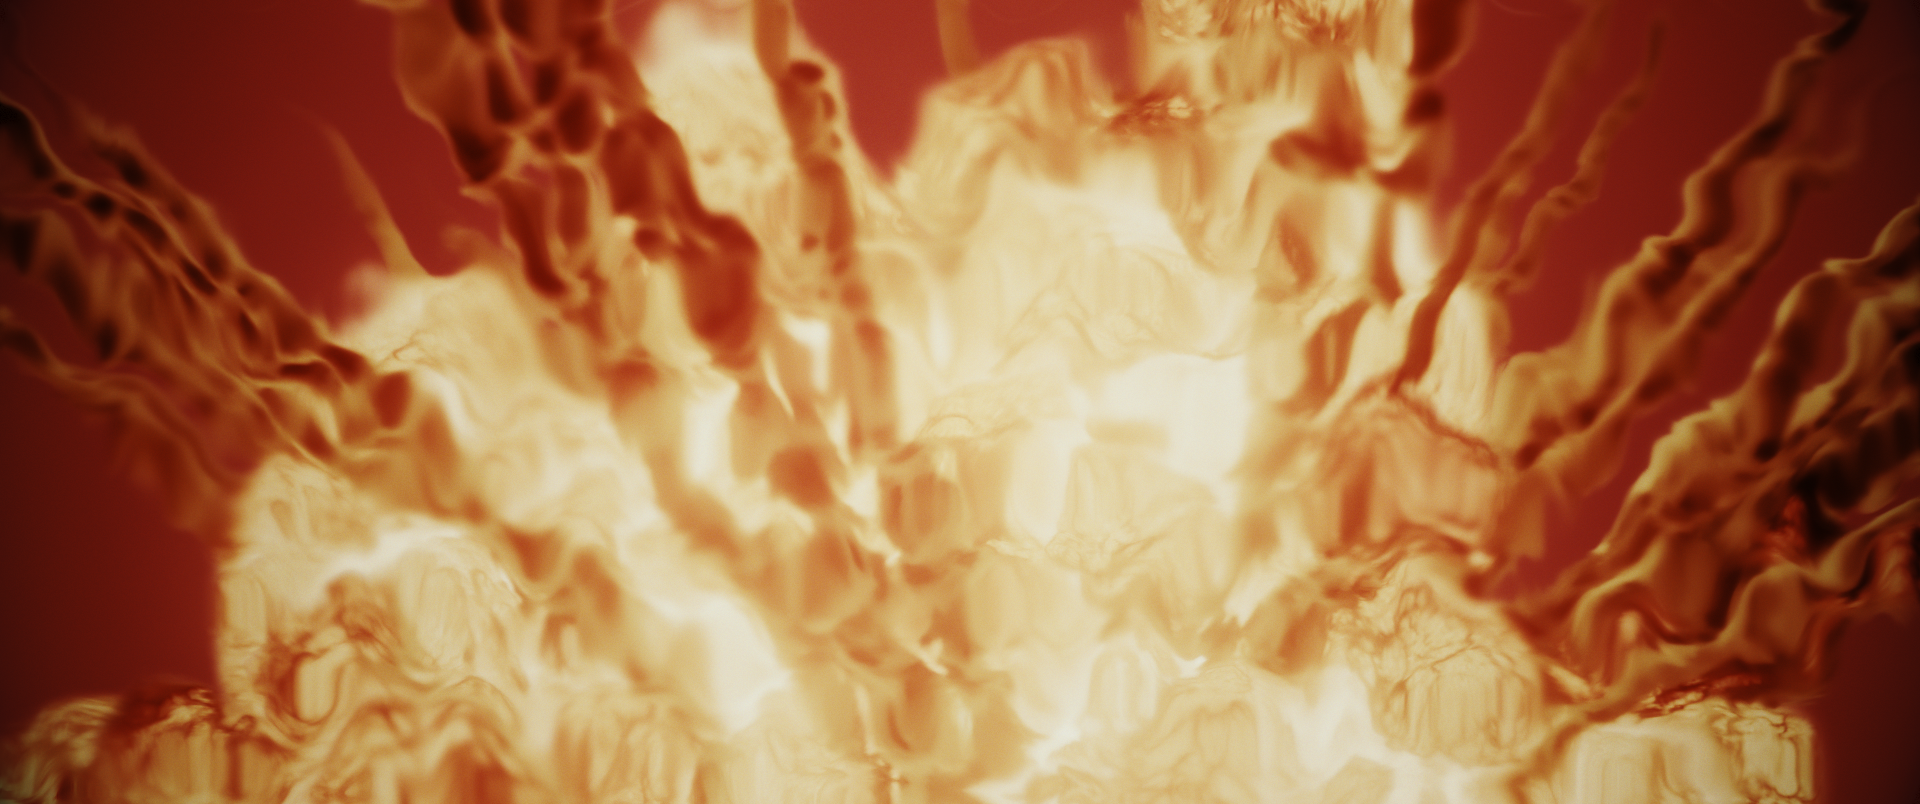
First, I created the explosion simulations using Houdini's pyro tools. I started by building the basic geometry of the scene, such as the ground and any buildings or structures that would be affected by the explosion. I then added the explosion source, which was typically a sphere or other shape that represented the initial blast.
Next, I set up the pyro simulation parameters, such as the resolution, buoyancy, and turbulence, to create a realistic explosion effect. I took care to adjust these settings carefully to achieve the desired look and feel for each explosion.
Once the pyro simulations were complete, I exported them as separate sequences to bring into After Effects. I then used the heat wave effect in RS Magic Bullet to stylize the explosions and give them a more unique look.
Using the heat wave effect, I adjusted the wave height, speed, and direction to create a more stylized effect. I also used additional Magic Bullet effects, such as color grading and lens distortion, to enhance the overall look of the explosion.
Throughout the process, I iterated on the simulation and stylization until I was happy with the final result. The combination of the realistic pyro simulations and the stylized heat wave effect helped to create a visually compelling and dynamic explosion effect for my thesis project.
Pyro / Explosions
First, I imported the Mixamo character into Cinema 4D and animated the fall. I paid close attention to the physics of the fall to make sure it looked as realistic as possible.
Once the animation was complete, I exported the character animation as an Alembic file and imported it into Houdini. I used the Alembic file to create a collider object that would interact with the bubbles.
Next, I generated bubbles using a pop net in Houdini. I adjusted the parameters to create the desired size and frequency of bubbles. I also added additional effects, such as turbulence and noise, to create a more realistic bubble effect.
To blend the bubbles into the particle fluid source, I used a fluid source node in Houdini. I set the parameters to create a particle fluid that would interact with the bubbles and the collider object.
Finally, I blended the bubbles into the particle fluid source by using a merge node. This allowed me to combine the bubbles and particle fluid into a single simulation, creating a more cohesive and realistic effect.
Throughout the process, I iterated on the animation, bubble generation, and blending until I was happy with the final result. The combination of the Mixamo character animation, the bubble generation, and the particle fluid source helped to create a visually compelling and dynamic effect of a character falling through a sea of bubbles.
Bubbles